Are you wasting time filling out your description and tags every time you upload a video? Stop right now because I am going to show you something that’s going to change your world! Well, not really but it will save you a bit of time. Watch the video below or scroll down for the old fashioned text version.
Why Use Upload Defaults
There are certain things you should include in your description and tags for every video you upload. For your description, you should have a paragraph introducing your business as well as links to your website and social channels. For your tags, you want to include your company name, business type and location.
But filling out these details each time seems like a long process. Let me introduce you to upload defaults.
How To Set Upload Defaults
Go to your YouTube Studio, click Settings in the bottom left-hand corner and then select ‘Upload defaults’. You can now apply defaults for your title, description and tags.
Click settings in the YouTube Studio
For our description, we have a link to our latest video (this is another great TubeBuddy feature), a link to the contact page on our website, a paragraph about our business and links to our website, LinkedIn and Facebook pages.
Set your upload visibility
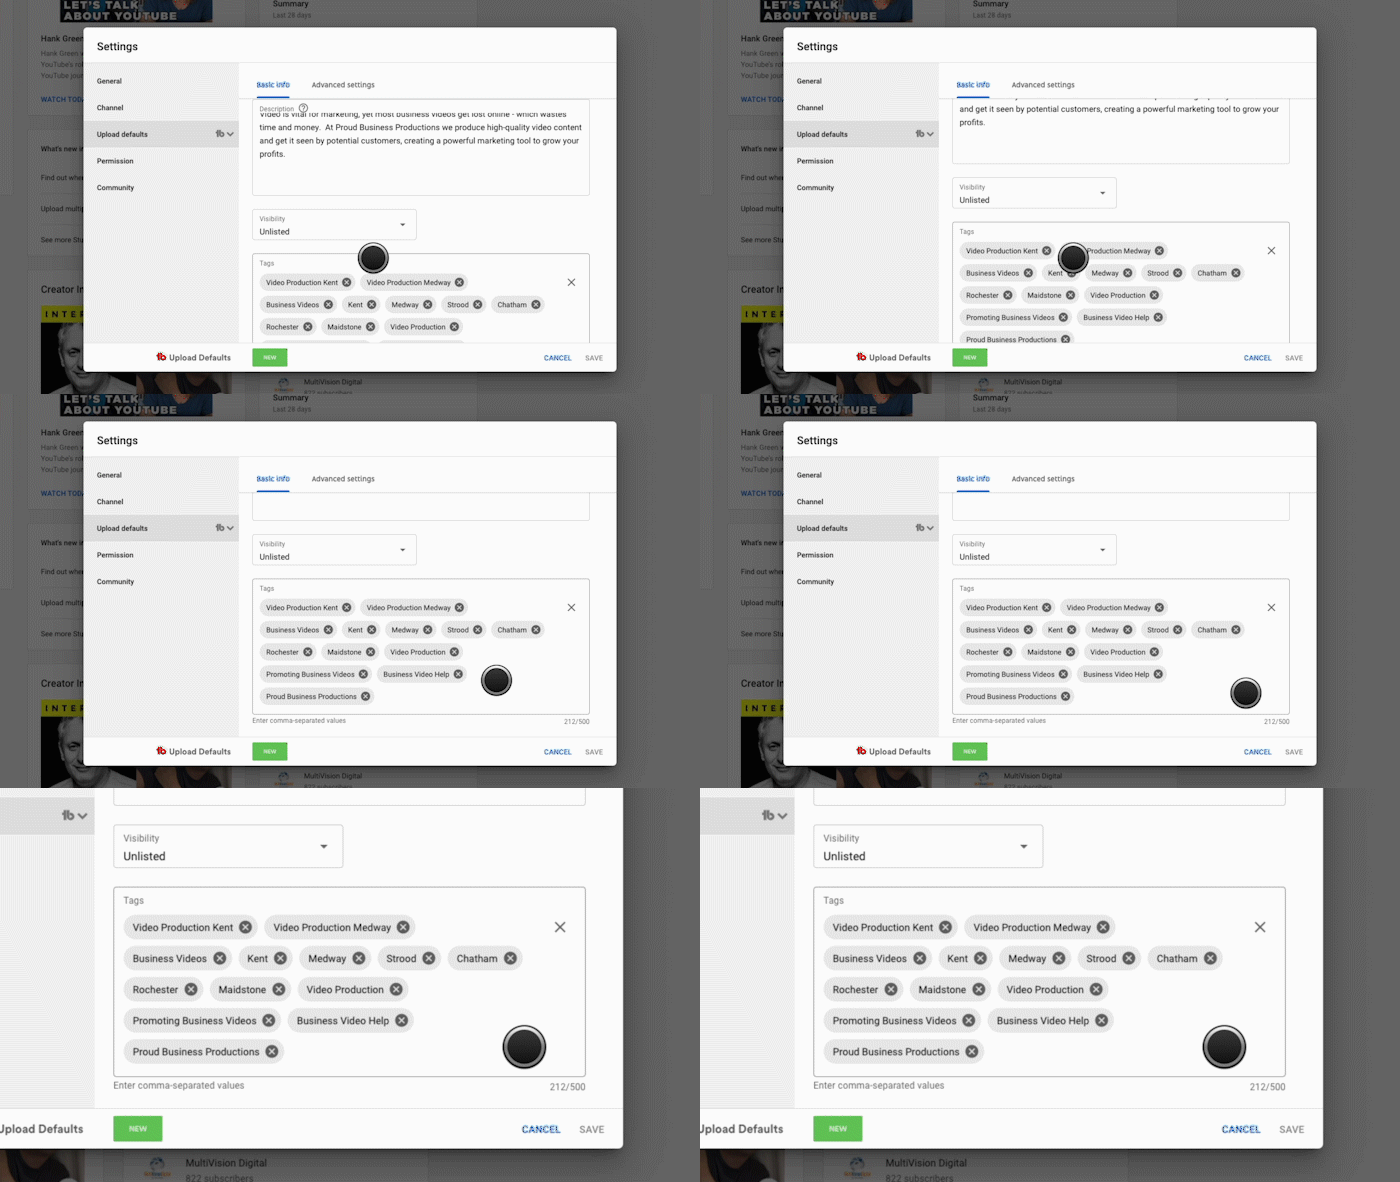
You can also change the visibility of your video. Before making a video public I like to add cards, end screens and subtitles so I upload our videos as unlisted meaning only people with a link to the video can see it, it won’t appear in search results.
Choose default tags
For the tags, I enter all the information I mentioned before as well as a few general terms that I would like our videos to be found for.
Don’t Forget The Advanced Settings
Check out the advanced settings
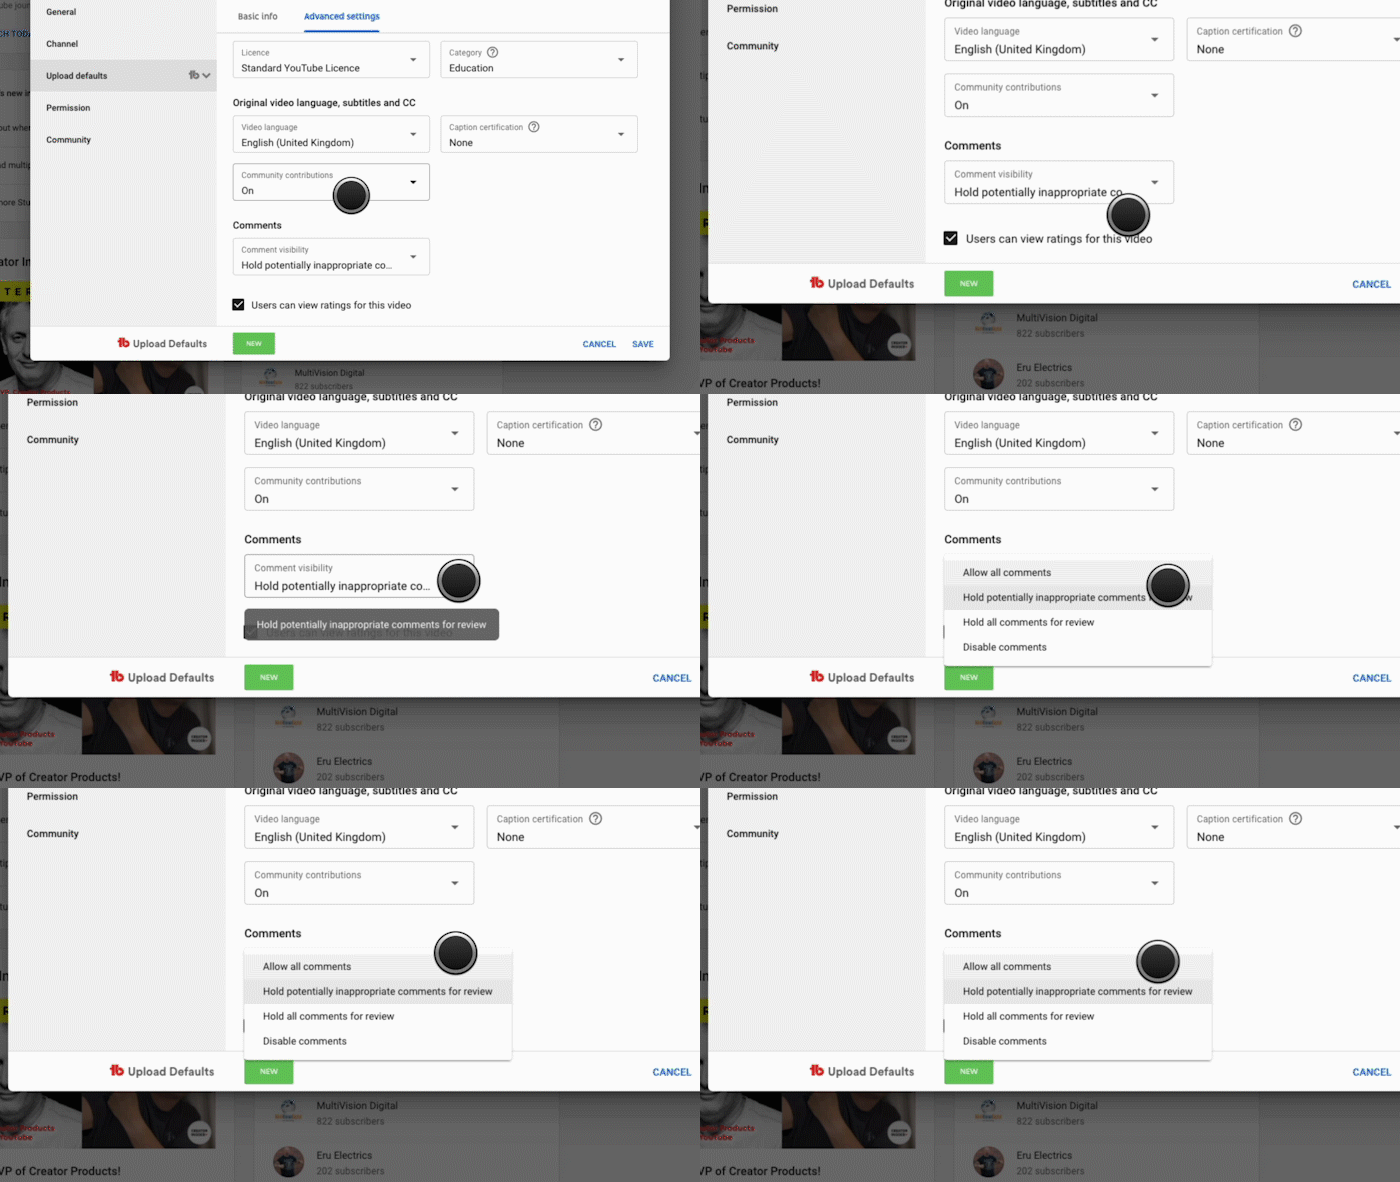
You might have noticed that there is also a tab for advanced settings. There are a lot of options in here that you should never have to worry about but a few you want to check are 'Category' (this helps YouTube understand the subject of your video), 'Video language' (this is for YouTube automatic subtitle transcriptions), 'Community contributions' (allowing your viewers to write subtitles for foreign languages) and 'Comment visibility'.
Pick your comment moderation type
You have 4 options here, allow all comments, hold potentially inappropriate comments for review (this is the option I would suggest to make sure your channel stays family-friendly), hold all comments for review and disable comments.
That’s A Wrap
So as you can see, filling out these details in the upload defaults will save you a lot of time when uploading your videos, especially if you are releasing content regularly.
Did you know that this feature exists? Let me know in the comments. If you’ve enjoyed this post then please share it with someone you think will benefit from reading it.
Do you want to make sure your YouTube channel is bringing in profits for your business? Then make sure you check out our new video series ‘Your Essential YouTube Checklist - 5 ways to make sure your channel boosts your business’ right here!


